Thursday 12 June 2008

New Website

I have just started a new website, its not that big yet but is growing every day. It has a few of my games on there at the moment, but i am writing some tutorials that i hope will benifit you.


thanks, this might be my last blogspot post.

Monday 19 May 2008

SteerWheels

Here is my new game SteerWheels!
You can play it here
It is a fun, interesting physics based game where you have to push the ball to the bar using the car (controlled by the arrow keys).


I created it back in february, but i acquired sponsorship for this game so me and my sponsor, GamesReloaded.com, spent the rest of the time tweaking it so that it was as perfect as could be managed.

It was made using CS3 (obviously) and APE, which is an open source flash physics engine. which is free and really easy to pick up. I will make a tutorial on the basics later.

This was also an experiment to see if i could make some money on a flash game. i have deduced that you can make anything from a really small amount to a massive sum.

One last thing for you to look at. 
These are the mochibot stats for SteerWheels and they are updated daily, so you can see how many websites and views the game has got. Even though it says the game has been out for 90 odd days, it has actually only been out for 7 days, So these stats are quite impressive (i think).

Feel free to comment!


Wednesday 9 April 2008

Sound in flash cs3 part 2 - pause

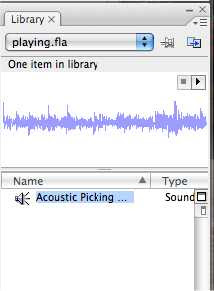
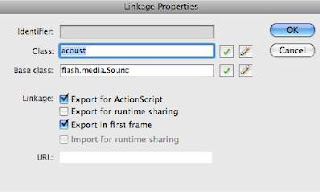
Ok, starting off with an example, heres an example where it loops infinitely and you are able to pause and resume it.


The code hasn't changed much but there are some subtle differences that have a lot of effect on the outcome.

When the pause button is pressed a new variable is set which tells the play button where to replay the sound from. Lets look at the code.


import flash.media.Sound;
var sound:Sound = new acoust();
var channel:SoundChannel;
var soundisplaying:Boolean = false;
var pausePosition:int = 0
playbut.addEventListener(MouseEvent.CLICK, playsound);
stopbut.addEventListener(MouseEvent.CLICK, stopsound);
function playsound(event:Event):void {
if (soundisplaying==false) {
channel = sound.play(pausePosition);
soundisplaying = true;
channel.addEventListener(Event.SOUND_COMPLETE, soundComplete);
}
}
function stopsound(event:Event):void {
pausePosition = channel.position;
channel.stop();
soundisplaying =false;
}
function soundComplete(event:Event):void {
channel = sound.play();
channel.addEventListener(Event.SOUND_COMPLETE, soundComplete);
}


Ok, the new pause position variable is the first new thing, it is set at 0 when the movie starts, this is the start of the sound.

The next change is within the soundplay function. Where instead of the channel = sound.play(0, 99) with channel.play(pausePosition), so to recap, this is to play the sound from pauseposition, which i set earlier.

Next i add the event listener for when the sound finishes, so i can loop it. ( i can't loop it the way i did last time as this interferes with the pause function)

The next change is the most important one, where i update the pausePosition when the stopbut button is pressed. This sets the place from which you can resume the play back when you press play.

The last thing i changed was to make a function which loops the music, it literally checks to see if the sound has finished and then replays the sound if it is.

Ok thats the basic sound tutorials over.


Tuesday 8 April 2008

Sound in Flash CS3


In flash, sometimes you might want to add a sound using actionscript, for example:- background music that repeats for ever, or a sound that plays only when you shoot a gun. I'm going to show you how to make this happen!


1st, find a sound or some music that you have in your computer, when you have found one remember its file path.
Next open up flash cs3 and click File:Import:Import to Library. and then choose your sounds file path from the menu that pops up. 


Then, press control + L to open the library and something like this should appear. 

Obviously the sound name will be different, but it will look mostly the same as this.

Next right click on the sound name (highlighted) and choose linkage from the menu that appears.


A box should pop up that looks something like this, but without the "Export for ActionScript" checkbox ticked. 
Check this and then write a class name in the box that is highlighted on the screenshot. But you have to remember this, as we will be using it a bit later. I have called mine "acoust", so if you have problems with the script i suggest you use that name.


Now we are ready to make the sound play.

just 3 lines of actionscript are required to make the sound play.

import flash.media.Sound;
var sound:Sound = new acoust();
sound.play(0, 99);

I am not going to make a demo, as it will be quite CPU intensive and also it will interfere with the later experiments.

Line 1: importing the necessary classes for the sound to play.
Line 2: Setting up a new variable "sound", which is a copy of the class "acoust" that we set up earlier.
Line 3: Setting the variable "sound" to play 99 times starting at 0 miliseconds.

Now lets make some buttons that can stop and play the sound.


This script is a lot more complicated than the 1st script that i showed you this is because i have had  to play and stop the sound on command. For this i had to add 2 more variables, one to see if the sound was playing and another one that is a soundchannel variable. some code:-


import flash.media.Sound;
var sound:Sound = new acoust();
var channel:SoundChannel;
var soundisplaying:Boolean = false;
playbut.addEventListener(MouseEvent.CLICK, playsound);
stopbut.addEventListener(MouseEvent.CLICK, stopsound);
function playsound(event:Event):void {
if (soundisplaying==false) {
channel = sound.play(0, 99);
soundisplaying = true;
}
}
function stopsound(event:Event):void {
channel.stop();
soundisplaying =false;
}


The first thing that you will notice is the new soundChannel variable "channel". This sets up a new channel which i will use to hold the sound.play() function.

Next, you will notice the "soundisplaying" boolean variable, this quite literally tells us if the sound is playing. I set this up to stop multiple versions of the sound playing when you pressed the play button. it is set to false to start with.

The next 2 lines are adding the event listeners for when the buttons are pressed. i have explained buttons in more detail in this tutorial.

You can see that i have added 2 new functions for controlling the sound. 

The first one plays the sound, but only is the boolean soundisplaying is set to false, that is what the if statement is for. The channel = sound.play is the same function as before, then i set the soundisplaying variable to true, so the user can't play the sound more than once.

The next function is the one that stops the sound playing. You cannot directly stop the sound, so you have to stop the soundChannel that it is attached to, so the code is channel.stop().
I also set the soundisplaying boolean to false, so that if you click the play button you can restart the sound.

thats it so far, next time i will be focusing on pausing and then replaying the sound from the pause point.

Saturday 29 March 2008

creating a platform game in as3 part 5

Welcome back, At the end of the last tutorial i wondered what would happen if we had a platform that you could jump underneath from.


As you can see, i have made the map a lot more complicated, and the simulation runs quite accurately until you go under the overhang on the left side. Where you can jump through the bottom of that platform. Lets change that.

We need to add a hit detection for when the top of the character hits the bottom of the land.


Ok, now you can't jump up through platform bottoms, but if you jump sideways into the hovering platform, you float down.

I will think on this matter for the next step in the tutorial.

Friday 28 March 2008

creating a platform game in as3 part 4

In the end of the last post we had a problem where the character vibrated. This was because when ever the character touched the floor i made it move up by one pixel. to rectify this i will make another hittest that detects when the character is one pixel off the floor and only calculate the velocity of the player if it returns false.


Some code:-

function run(event:Event) {
velocity+=gravity;
if (land.hitTestPoint(char.x, char.y+char.height/2, true)) {
velocity = 0;
char.y--
}
if (!land.hitTestPoint(char.x, char.y+char.height/2+1, true)) {
char.y += velocity;
} else {
velocity=0;
if (attemptJump==true) {
char.y--;
velocity =-5;
}
}
if (goleft==true) {
char.x+=lspeed;
}
if (goright==true) {
char.x+=rspeed;
}
}

This is only the new run function because that's all i have changed.

I have removed the else statement that i created last time to calculate the velocity and moved it to the new hitTest where i calculate if the character hits one pixel above the land.

The other thing that i have changed is to move the attemptjump function to the new hitTest and add to it another char.y-- which means that the character will be able to jump with the new hitTest in place.

Heres a demo.


Ok thats that problem fixed. Now i have noticed that when you walk into a steep wall, you seem to go into it for a bit and then float to the top if you stop. To fix this we can make it so that you can't walk up steep hills. We can do this 2 ways, either by creating 2 more  movieClips, 1 either side of the character and calculating the gradient in between them. Or we can use the hitTestPoint function again and use it to calculate a point that stops the player moving if the hill is too steep. i have chosen the latter because it is easier and will run quicker.

First we need to change the land movieClip so that it has some steep hills at either side of the screen. 
Next we have to create the new hitTest functions. 

some code, just the new run function again.


function run(event:Event) {
velocity+=gravity;
if (land.hitTestPoint(char.x, char.y+char.height/2, true)) {
velocity = 0;
char.y--;
}
if (!land.hitTestPoint(char.x, char.y+char.height/2+1, true)) {
char.y += velocity;
} else {
velocity=0;
if (attemptJump==true) {
char.y--;
velocity =-5;
}
}
if (!land.hitTestPoint(char.x-char.width/2, char.y+char.height/4, true)) {
if (goleft==true) {
char.x+=lspeed;
}
}
if (!land.hitTestPoint(char.x+char.width/2, char.y+char.height/4, true)) {
if (goright==true) {
char.x+=rspeed;
}
}
}

As you can see from the code i have put the new hitTest functions in front of the move left and right functions. Lets look at the first one, the "goleft" function. i have put a conditional statement in front of the old goleft function. Note the exclamation mark in front. This means that you can go left only if the character's left hand side, a quarter up from the foot, is not touching the land. 
It is nearly the same code for the goright function, but if look carefully, you will see that instead of a "char.x-char.width/2" we have a "char.x+char.width/2" this is just declaring a point on the right side instead of the left.

Heres a demo


As you can see, the demo runs fine, you can't walk up steep hills but you can still jump up them. Thats fine for now.

In the next tutorial i am going to see what happens if i add a floating platform that you can go underneath and jump on to.

creating a platform game in as3 part 3

You should read this and this before continuing, if you haven't already. 

This little platform engine works fine at the moment, but most platform games have more than one platform. i will add another platform and see how that goes.


click inside the demo to gain focus and then use the arrows to move.

if you move right on the screen you will see that we have a problem. the character is floating on the screen!! This is because we are using hitTestObject and not hitTestPoint. Lets change that.

So we can make some more complex terrain, i have made a new movieClip linkaged as ground, and another one linkaged as character. These replace the land and char movieclips that we drew in actionscript earlier.

code:-

import flash.display.*;
import flash.events.*;
stage.frameRate = 30;
stage.addEventListener(Event.ENTER_FRAME, run);
stage.addEventListener(KeyboardEvent.KEY_DOWN, keyPressed);
stage.addEventListener(KeyboardEvent.KEY_UP, keyReleased);

var gravity:Number = 0.2;
var velocity:Number = 0;
var lspeed:int = -2;
var rspeed:int = 2;
var goleft:Boolean = false;
var goright:Boolean=false;
var attemptJump:Boolean=false;
var char:MovieClip = new character();
char.x=200;
char.y=0;
stage.addChild(char);

var land:MovieClip = new ground();
land.x=200;
land.y=300;
stage.addChild(land);

function keyPressed(event:KeyboardEvent):void {
switch (event.keyCode) {
case Keyboard.UP :
attemptJump = true;
break;
case Keyboard.LEFT :
goleft = true;
break;
case Keyboard.RIGHT :
goright = true;
break;
}
}
function keyReleased(event:KeyboardEvent):void {
switch (event.keyCode) {
case Keyboard.UP :
attemptJump = false;
break;
case Keyboard.LEFT :
goleft = false;
break;
case Keyboard.RIGHT :
goright = false;
break;
}
}

function run(event:Event) {
velocity+=gravity;
if (land.hitTestPoint(char.x, char.y+char.height/2, true)) {
velocity = 0;
char.y--;
if (attemptJump==true) {
velocity =-5;
}

} else {
char.y += velocity;
}
if (goleft==true) {
char.x+=lspeed;
}
if (goright==true) {
char.x+=rspeed;
}
}

The most important thing that i have changed is the hitTest function - if (land.hitTestPoint(char.x, char.y+char.height/2, true))  This is a much better way of doing it than hitTestObject because you can have angled platforms. Lets explain the if statement. if the "char" movieClip's foot hits the land than do the function that follows. Lets focus on the char.y+char.height/2 this declares the "foot" of the moviclip as the registration point of "char" is in its centre. so centre + half the height gives the bottom.

The next thing that you will notice i have changed is to put a char.y-- in the hitTest function. this just keeps the "char" movieclip on the top of the floor, so it doesn't sink through it.

The only other thing that i have changed is to add an "else" statement to the if statement that checks the hitTest between the "char" movieclip and the "ground" movieclip, and move the line of code that makes the "char" fall (char.y += velocity;) into it. This just means that it only makes the "char" fall if its not touching the ground movieclip.

Demo


As you can see from the demo, you can successfully walk up and down slopes without problem. But the character seems to vibrate, which is kind of weird in a platform game! This is easily rectified and i will show you how in the next tutorial.

Thursday 27 March 2008

creating a platform game in as3 part 2

Read creating a platform game in as3 if you haven't already.


In this tutorial i will show you how to make your character move and jump.

So... we need to make a function for key up events and for key down events to monitor key input so that we can have player controlled characters.

lets put this into code


import flash.display.*;
import flash.events.*;
stage.frameRate = 30;
stage.addEventListener(Event.ENTER_FRAME, run);
stage.addEventListener(KeyboardEvent.KEY_DOWN, keyPressed);
stage.addEventListener(KeyboardEvent.KEY_UP, keyReleased);

var gravity:Number = 0.2;
var velocity:Number = 0;
var lspeed:int = -2;
var rspeed:int = 2;
var goleft:Boolean = false;
var goright:Boolean=false;
var attemptJump:Boolean=false;
var char:MovieClip = new MovieClip();
char.graphics.lineStyle(2, 0x112233);
char.graphics.beginFill(0x112233);
char.graphics.drawRect(200, 0, 20, 50);
char.graphics.endFill();
addChild(char);

var land:MovieClip = new MovieClip();
land.graphics.lineStyle(2, 0x112233);
land.graphics.beginFill(0x112233);
land.graphics.drawRect(0, 350, 400, 25);
land.graphics.endFill();
addChild(land);

function keyPressed(event:KeyboardEvent):void {
switch (event.keyCode) {
case Keyboard.UP :
attemptJump = true;
break;
case Keyboard.LEFT :
goleft = true;
break;
case Keyboard.RIGHT :
goright = true;
break;
}
}
function keyReleased(event:KeyboardEvent):void {
switch (event.keyCode) {
case Keyboard.UP :
attemptJump = false;
break;
case Keyboard.LEFT :
goleft = false;
break;
case Keyboard.RIGHT :
goright = false;
break;
}
}

function run(event:Event) {
char.y+=velocity;
velocity+=gravity;
if (char.hitTestObject(land)) {
velocity = 0;
}
if (attemptJump==true) {
velocity =-5;
}
if (goleft==true) {
char.x+=lspeed;
}
if (goright==true) {
char.x+=rspeed;
}
}


Click inside the demo to focus than use the arrow keys to move and jump. You will notice a problem where you can float, we will fix this later, but for now the new code...explained!

Lines 5-6: New event listeners for the key up and key down events.
lines 9-10: These are new speed variables, left speed and right speed.
lines 11-13: These are boolean statements, true or false statements. They are declared now rather than when i use them.
Key Pressed Function: This function is called whenever a key is pressed. When the UP key is pressed the attemptjump boolean = true. When the LEFT and RIGHT keys are pressed the booleans goleft and goleft are called true respectively.
Key Released Function: This function is called whenever a key is released. In the event of the UP key being released attemptjump is called false, the other booleans are also called false.
Run function: I have made some changes to the run function, where i make use of the attemptJump, goleft and goright booleans. Another if statement for each boolean. eg if (attemptJump==true) . This is called whenever the attemptJump boolean is true, so when the UP key is pressed and it makes the velocity = -5. I use 2 more if statements for the other booleans, where i increase the "char"'s x position by lspeed, if goleft = true, or rspeed, if goright = true.

Now to sort out that unlimited jumping issue.

I think we can sort this by only allowing the player to jump if its touching the floor.

some code, just the new run function.

function run(event:Event) {
char.y+=velocity;
velocity+=gravity;
if (char.hitTestObject(land)) {
velocity = 0;
if (attemptJump==true) {
velocity =-5;
}
}
if (goleft==true) {
char.x+=lspeed;
}
if (goright==true) {
char.x+=rspeed;
}
}

All i have changed is put the if (attemptJump==true) statement inside the hittestobject statement. This means that it only checks to see if the player is attempting to jump if the "char" movieClip is touching the "land" movieClip.

A demo is in order!


Thats it for the 2nd part of my platform tutorials. Please wait for the next in the series.

Creating a platform game in as3

I've always wanted to create a platform game, so here goes. 


In a platform game we have a moving character, several platforms, and some type of vector, such as gravity or wind.

I'm going to create all of the movieclips in actionscript for now, so you won't need to set anything up.

import flash.display.*;
import flash.events.*;
stage.frameRate = 30;
stage.addEventListener(Event.ENTER_FRAME, run);

var gravity:Number = 0.2;
var velocity:Number = 0;
var char:MovieClip = new MovieClip();
char.graphics.lineStyle(2, 0x112233);
char.graphics.beginFill(0x112233);
char.graphics.drawRect(275, 0, 20, 50);
char.graphics.endFill();
addChild(char);

var land:MovieClip = new MovieClip();
land.graphics.lineStyle(2, 0x112233);
land.graphics.beginFill(0x112233);
land.graphics.drawRect(0, 350, 550, 25);
land.graphics.endFill();
addChild(land);

function run(event:Event) {
if (char.hitTestObject(land)) {
velocity = 0;
}
char.y+=velocity;
velocity+=gravity;
}


 Ok you may need to refresh the page to view the swf.
as you can see, the character block falls down with increasing velocity and as it hits the floor it stops.

Lets explain the code so far:-

Lines 1-2: Importing the packages that i will use in my actionscript file
line 3: Setting the framerate to 30, this is how many frames per second go past.
line 4: This is an eventlistener that runs the function run on every frame, so 30 times a second.
lines 5-6: Setting up the variables, gravity will be a constant but velocity will change.
line 7: Setting up a new movieClip called char
line 8: The lineStyle of the char movieClip, 2 pixels thick and a dark blue colour.
line 9: The fill colour of char, same as the line colour
line 10: Creating a shape for the char movieclip, this is a rectangle. drawRect(x, y, width, height)
line 11:Telling flash to end the fill that we started on line 9
line 12: Adding the char movieclip to the stage.
lines 13-19: Setting up the land movieclip, the same way as we created the char movieclip.
line 20: Declaring the function "run" with an event type of event.
lines 21-23: An if statement that says if the char movieClip collides with the land MovieClip than set the velocity to 0.
line 24: Setting up the gravity vector, so that the "char" movieClip's  y axis is affected by velocity.
line 25: Increasing the velocity variable by gravity once per frame. This will make the char fall to the land with increasing speed.

Thats all for this first post on creating a platform game in as3.
The next section will be out shortly.

Tuesday 25 March 2008

Controlling timeline events

In Flash, if you want to stop, play or move to a certain frame in the movie you have to use actionscript.

First - stop. To stop a flash movie you simply have to write stop() in the actions panel of the frame you want the movie to stop at.


Play. This is just as easy as the stop function, just write play(). flash plays movies automatically so you won't need to use this command as much as stop.

To move forward and backward one frame use nextFrame(), to go forward, and prevFrame(), to go backwards.

The most useful of the timeline controls are the gotoAndStop(num) and the gotoAndPlay(num) functions. To use them just replace "num" with the frame number that you want to play or stop, or even you can replace it with a frame label in "".

Lets put this in to action with a demo.


Click on the buttons to effect the movie.


The code is as follows : -
import flash.events.MouseEvent;
playbut.addEventListener(MouseEvent.MOUSE_DOWN, playFunction);
stopbut.addEventListener(MouseEvent.MOUSE_DOWN, stopFunction);
nextframebut.addEventListener(MouseEvent.MOUSE_DOWN, nextframeFunction);
prevframebut.addEventListener(MouseEvent.MOUSE_DOWN, prevframeFunction);
function playFunction(Event:MouseEvent):void {
play()
}
function stopFunction(Event:MouseEvent):void {
stop()
}
function nextframeFunction(Event:MouseEvent):void {
nextFrame()
}
function prevframeFunction(Event:MouseEvent):void {
prevFrame()
}

I'm using the same button code from my last tutorial, but replacing the trace("") function with the functions i have talked about in this tutorial.

explaining the code:-
line 1 - importing the Mouse Events
line 2 I'm adding event listeners to the buttons instance names that i have. When the mouse is touching playbut and it is pressed, do the playFunction.
line 3-5 same as line 2 but for different functions.
line 6-8 This is the playfunction, which is called every time the playbut is pressed. it makes the flash movie play, as i have explained earlier in the post.
9-17 These are the other functions, called by the event listeners. 

Well, that's it for timeline events.

If your unsure about buttons, check out my earlier tutorial here 

Buttons in as3

The first thing i did when i opened CS3 for the first time was tried to create a button. 

I obviously tried to do it the as2 way, forgetting that most of the actionscript language had changed so i drew a object, then converted it to a button. But when i tried to add actions to it, flash said "Current selection cannot have actions applied to it.". 
What you have to do is to write the actions in the frame.
i will do a step by step tutorial, to show you how its done.
  • Open up a new Flash Actionscript 3 file in the way that i explained before.
  • Draw a button shape.
  • Highlight the button shape and press F8. A box should pop up that looks like this.                                                                                                                                                                                
  • Click on "Button" in the type section and name the button appropriately.
  • Press "OK" to continue, which should take you back to the stage where you're button is.                
  • Click on your button and look to the bottom of the screen, where the properties bar should be.                                                                                                                                                                                                                                                                                                              
  • Write an instance name in the box provided. I have called mine "buttonTest". This is important for when we do the script.
  • Now we are ready to write the Actionscript for this button. All the button is going to do is trace a message in the output panel. Make a new layer and call in "actions". To do this click on the "insert layer" button, where my cursor is and then double click on the new layer title, "Layer 2" to edit it's name.                                                                                                                                                                                                                                                                                                                                                                                                                                                                                                                           
  • Click on the frame head of layer 2 frame one, which should be a white rectangle with a white circle in the middle, like the one in this image, and press alt+F9 to open the action panel.
  • This is where we have to start coding the button. In the actions panel that you just opened write...

    import flash.events.MouseEvent;
    buttonTest.addEventListener(MouseEvent.MOUSE_DOWN, traceFunction);
    function tracefunction(Event:MouseEvent):void{
    trace("Button Clicked")
    }


Explaining the code:-
line 1 - importing the Mouse Events
line 2 I'm adding event listeners to the buttons instance names that i have. When the mouse is touching buttonTest and it is pressed, do the traceFunction.
line 3-5 This is the traceFunction. It is a MouseEvent function that is executed when the buttonTest is pressed. When it is pressed the trace function is called which traces the message "Button Clicked" in the output panel.

  • Test your movie by pressing Command+Enter, (control+Enter on windows)
  • You should see that when you click the button a message comes up in the output panel that says "Button Clicked".
  • Thats all for the button tutorial, i will explain how to make functions in a later post.

Getting started with as3


i will start from the very basics of learning as3. 
Most of my tutorials will start this way, i know it's extremely basic stuff, but some people might have bought flash and then haven't a clue how to use it!
                                                                                                                                                                                                                                                                                                                                                                                                                                                                                                                                                                                                                                         
Open up flash a menu should appear which looks like this, without the recent items column. 

To create a new flash file just click on "Flash File (Actionscript 3.0), where the arrow is pointing.

This will create exactly what it says, a new as3 flash file.

When you have clicked it, the stage will appear. this is where you will create your flash projects, using the tools on the left hand side. 


i am more interested in the actions panel, which you can bring up by pressing alt+F9.

This is where you can write actionscript, the programming language of flash. 


Welcome

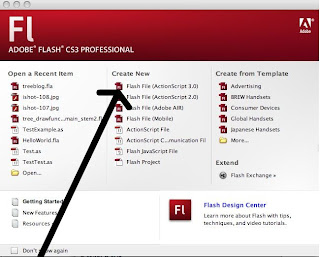
Well, as of now i have a blog! Which i will dedicate to helping you (and me) learn as3. 


Since christmas of this year, i bought a copy of adobe CS3 but i didn't know anything about actionscript  3. Up until then i had a copy of flash mx 2004 and i was quite adapt at actionscript 2. The problem came when i tried to start learning as3 from tutorials on the web, as i couldn't find the stuff i wanted to do. 
Thus, this blog was born.